Infineon AURIX TC2xx/TC3xx: From INI files to winIDEA GUI settings - synchronization & peripheral suspension configuration guide
This guide helps with the transition from using the INI files to using winIDEA GUI settings to configure synchronization and peripheral suspension. If you are also migrating from an old winIDEA version, please refer to the general transition guide as well.
Review CPU-specific Reset settings
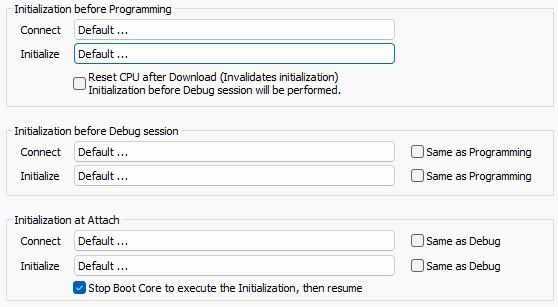
Open Hardware | CPU Options | Reset and make the following changes:
1. Configure initialization settings:
Since winIDEA will configure the synchronization and peripheral suspension settings on the device, it is advised to remove any TC_<xy>_OCDS_Initialization.ini files from the Initialize fields:
- Select Initialization before Programming/Debug Session/Attach: Initialize to Default
- Uncheck Same as Programming in Initialization before Debug session: Initialize
- Uncheck Same as Debug in Initialization at Attach: Initialize

2. Configure the peripheral suspension:
- Enable Suspend peripherals while stopped.
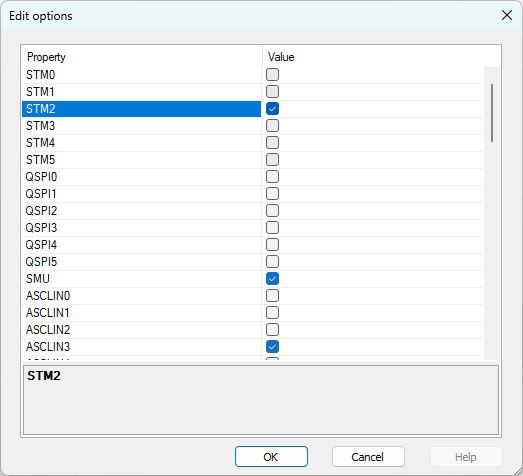
- Click on the "..." and check the boxes next to the peripherals you want to suspend.
If you are using an INI file to suspend the peripherals, check which peripherals are suspended in your use case. For example, if you want to suspend STM2, SMU, ASCLIN3, select each of the boxes, and then confirm with OK.

Configure the synchronization
1. Go to Hardware | CPU Options | Debugging, and enable Synchronize selected cores (stop/run) when possible.
2. Go to Hardware | CPU Options | Cores / CPU and enable:
- Synchronize this core - Using On-chip logic for every core
- Automatically observe this core for each core you would like to debug
To see which cores were synchronized in your previous setup, you can also check the TCx_OCDS_initialization.ini from the winIDEA directory (SFR folder), and then select the corresponding cores in winIDEA.
If the core is observed and synchronized, it will act as a suspend master (e.g., if you stop that core explicitly, it will activate the suspend signal, and stop all the other synchronized cores and peripherals). If a core is not observed and is synchronized, it will act as a suspend slave, meaning if a suspend master is stopped, that core will also be stopped, but it will not control the suspend signal itself.